How To Make Cupcake stickers
Here is how to make your own cupcake stickers at home. Making cupcake stickers is simple and fun with a free printable, acrylic markers, and tape. In this tutorial, I show how to print your designs, color them with bright acrylic markers, and cut and seal them with tape for durable, glossy stickers. These cupcake stickers are great for planners, journals, and scrapbooks. You can layer colors, add details, and create cheerful designs that stand out. This method gives you handmade stickers that are easy to make at home and enjoyable to create.
Using acrylic markers changed everything for me because the colors pop and it feels smooth on the paper. I like to make a batch while listening to music and keep them ready for decorating my planner throughout the week. It’s such a relaxing way to spend an afternoon, and I love seeing how each sticker turns out slightly different and full of personality.
How To Make Cupcake Stickers
It’s time to start making your cupcake stickers. I’ll walk you through each step from printing the designs to coloring and sealing them with tape. Follow along and you’ll have cheerful, handmade stickers ready to use in no time.
Supplies For DIY Cupcake tickers
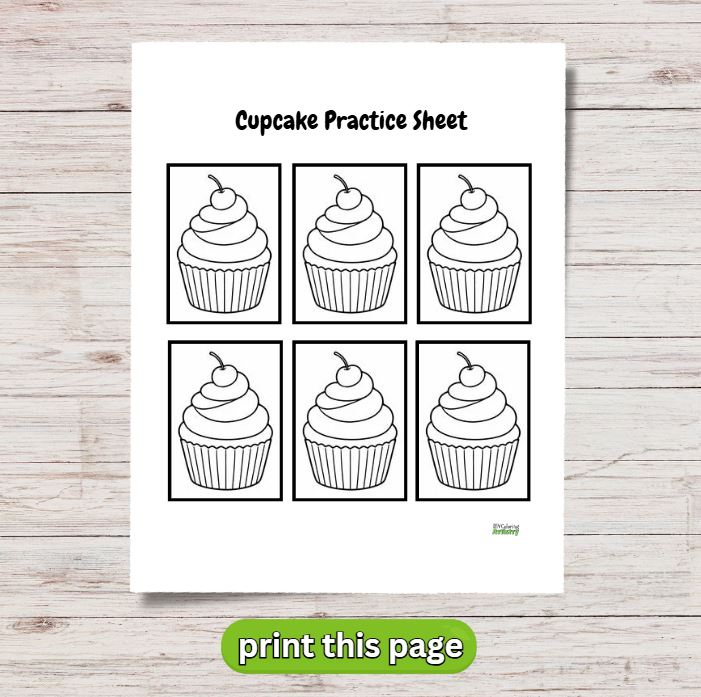
Step 1: Print The Cupcake Practice Sheet
Start by downloading and printing the free cupcake practice sheet. This gives you a guide to follow while coloring and makes it easy to try out different designs. Use regular printer paper or sticker paper if you want to turn them into stickers right away.
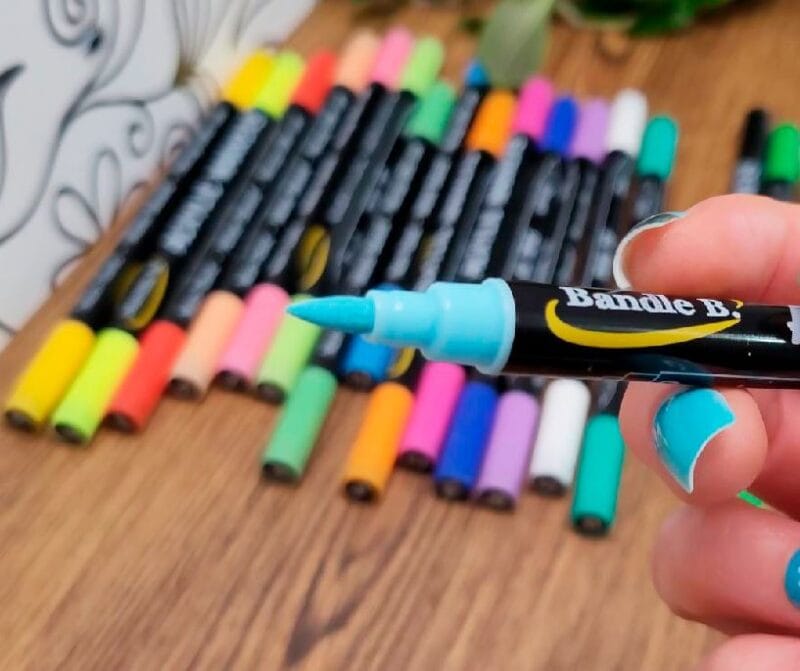
Step 2: Choose Your Colors
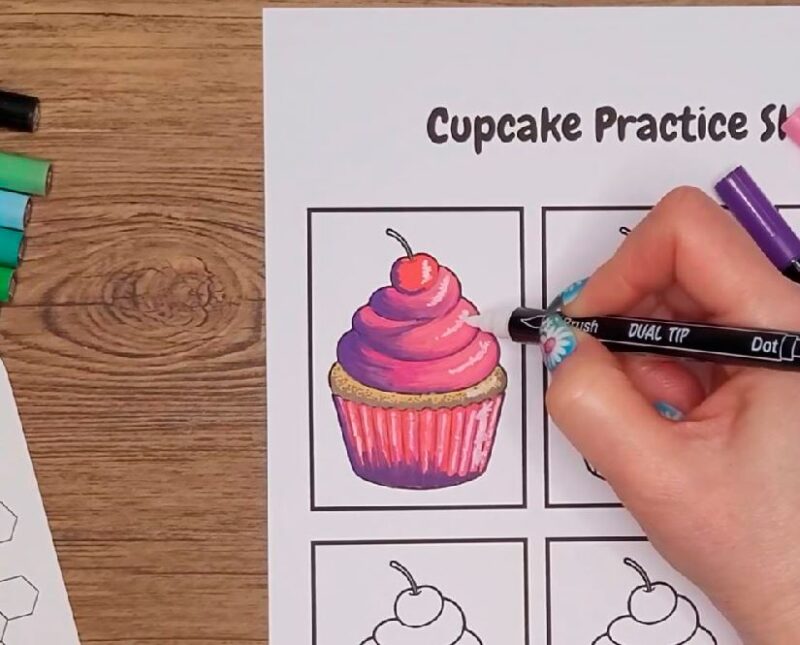
Pick the colors you want for your cupcakes. I’m using an acrylic marker set by Bandle B and selecting 3 to 4 markers in the same color range, from light to dark. I like this set because of the brush tip. This lets you add depth and shading to your designs, making each cupcake look bright and cheerful.
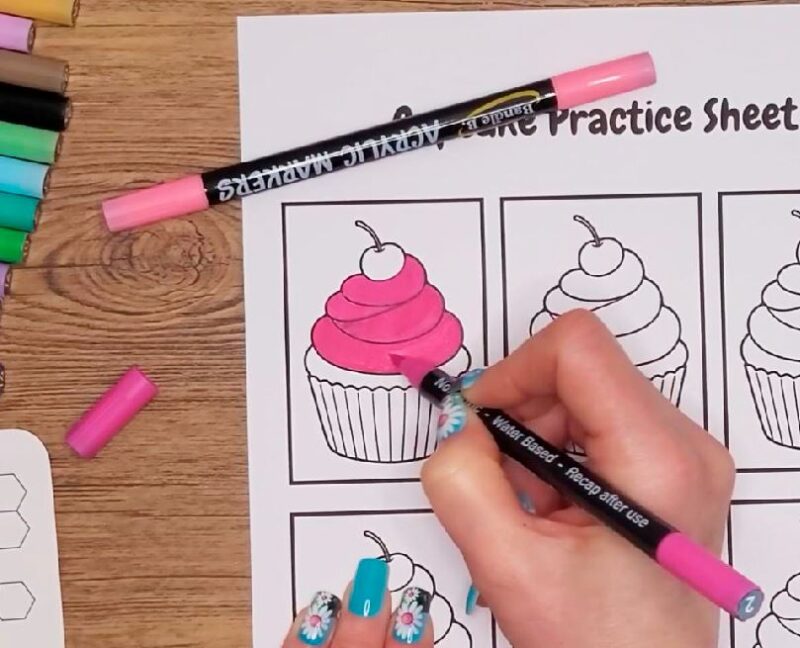
Step 3: Fill In The Frosting
Start by filling in the cupcake frosting with a middle shade from your color selection. The great thing about acrylic markers is that you can layer a fresh color on top, and it will stand out beautifully. This makes it easy to add highlights or shadows and gives your cupcakes a bright, dimensional look.
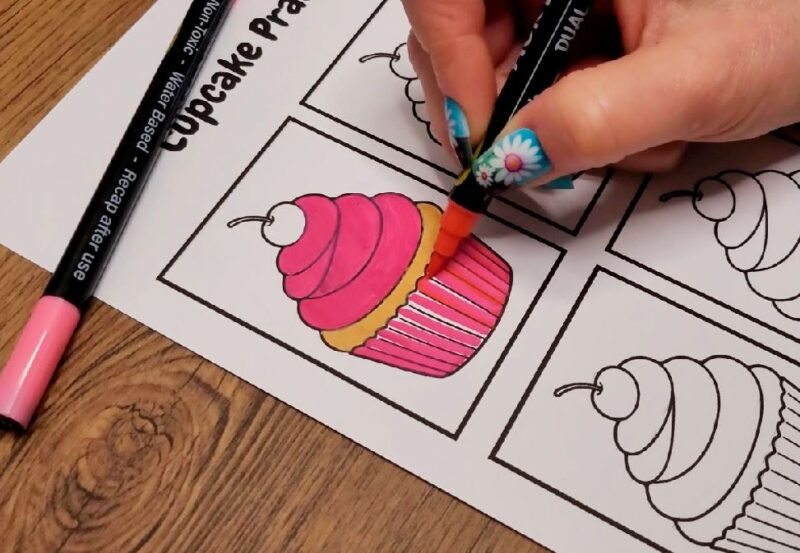
Step 4: Color The Rest of The Cupcake
After finishing the frosting, move on to the cupcake base and any other parts of your design. Use your chosen colors to fill in each section completely, keeping the strokes smooth and consistent.
Step 5: Start Adding Layers
Once the base colors are filled in, you can begin layering additional colors with your acrylic markers. Add a lighter or darker shade on top of the frosting or cupcake base to make the colors pop. The layers will stand out clearly on top of the base color, giving your stickers a vibrant, handmade feel. Keep building the layers until you’re happy with how each cupcake looks.

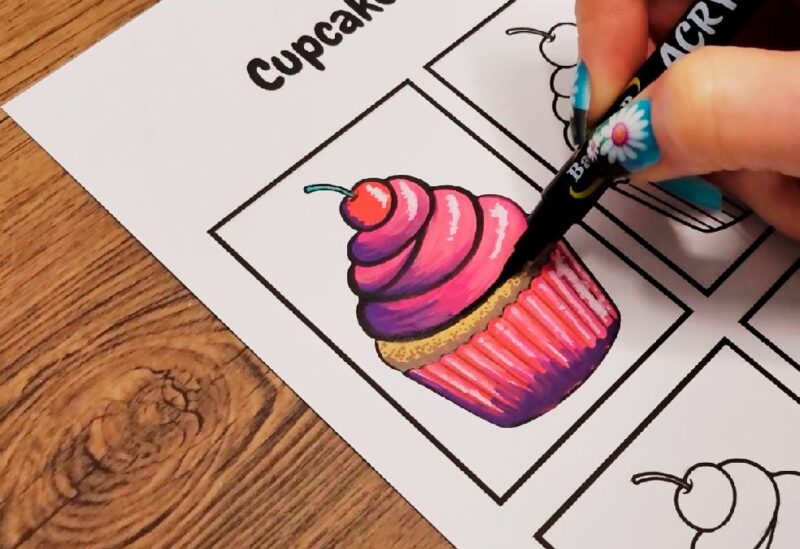
Step 6: Add White Highlights
Use a white acrylic marker to add small highlights to the frosting and cupcake details. This makes your cupcakes look shiny and adds a fun, dimensional effect. Focus on areas where light would naturally hit, like the top curves of the frosting or the edges of decorations.
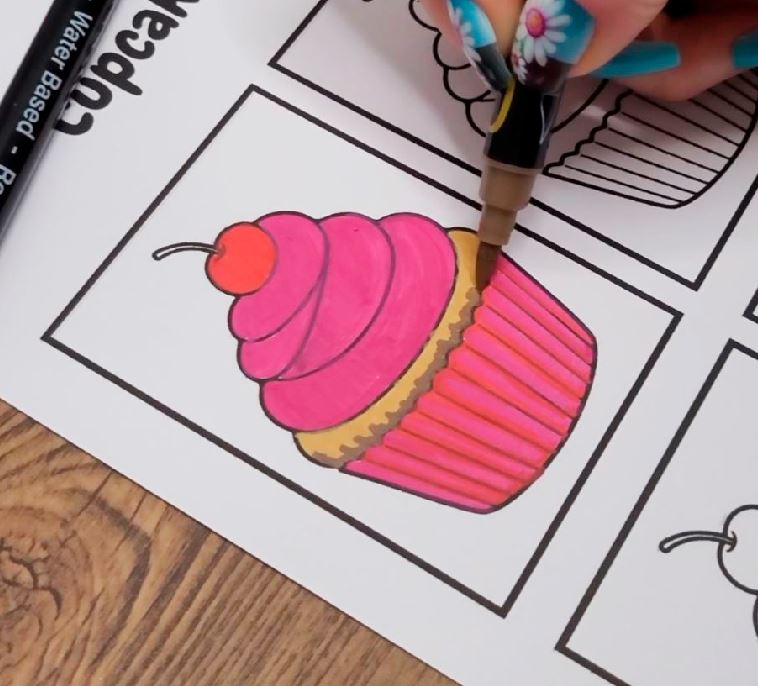
Step 7: Go Over Lines With Black
Once all the colors and highlights are done, carefully trace the outlines of your cupcakes with a black marker. This makes the design stand out and gives the stickers a retro and defined look. Use steady strokes to follow the edges of the frosting and base. After that add in any other details or fix up the highlights to make them stand out more.

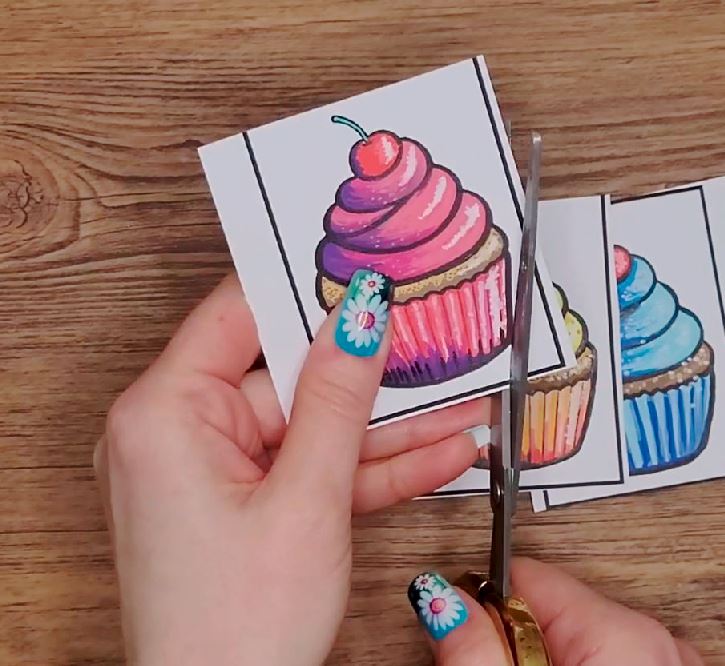
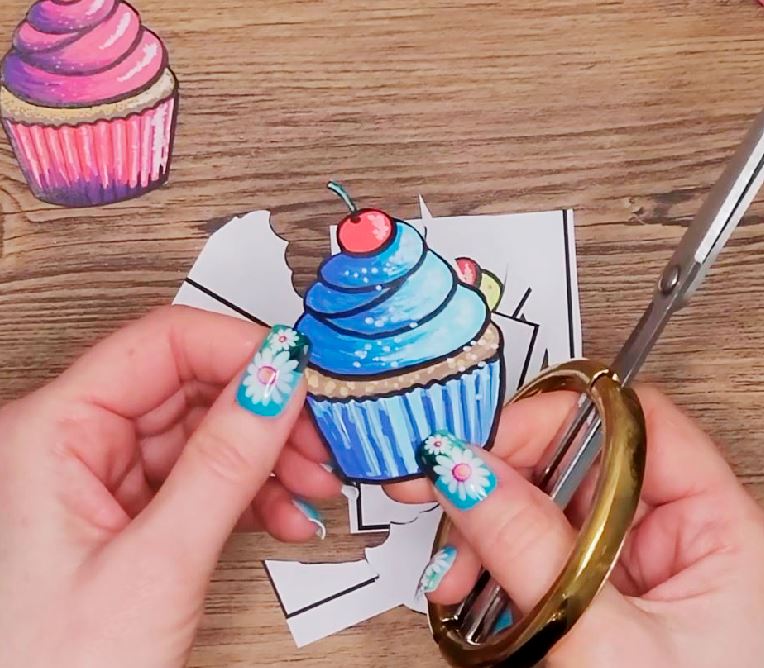
Step 8: Cut out The Stickers
Once your cupcake are fully colored and dry, cut them out.
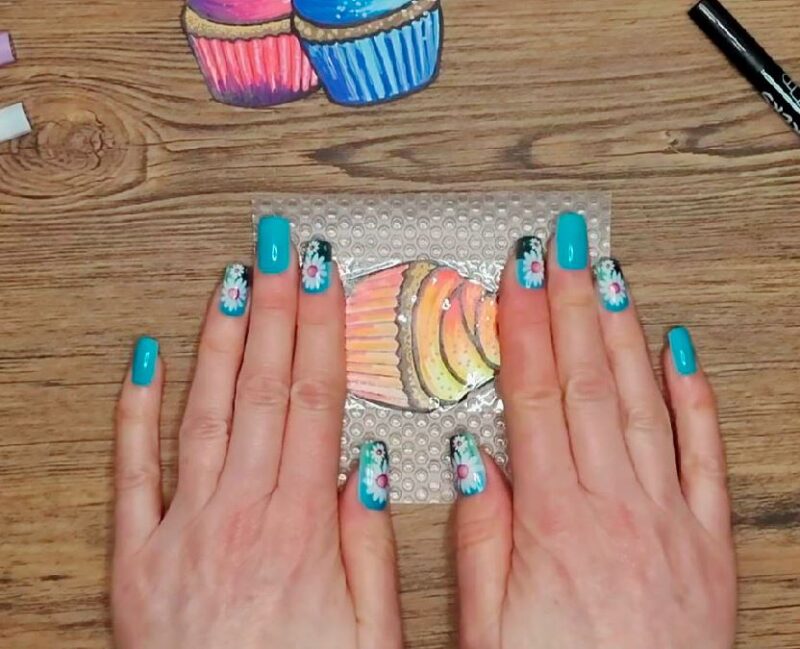
Step 9: Add The Tape Topping
Then place them face up on a surface that the tape will not stick to. I like to use a plastic sheet for this step. This makes it so much easier to lift your stickers later. Cut a piece of clear packing tape slightly larger than your cupcake and press it down over the design. Start at one side and slowly smooth it across with your fingers or a card to press out any air bubbles.
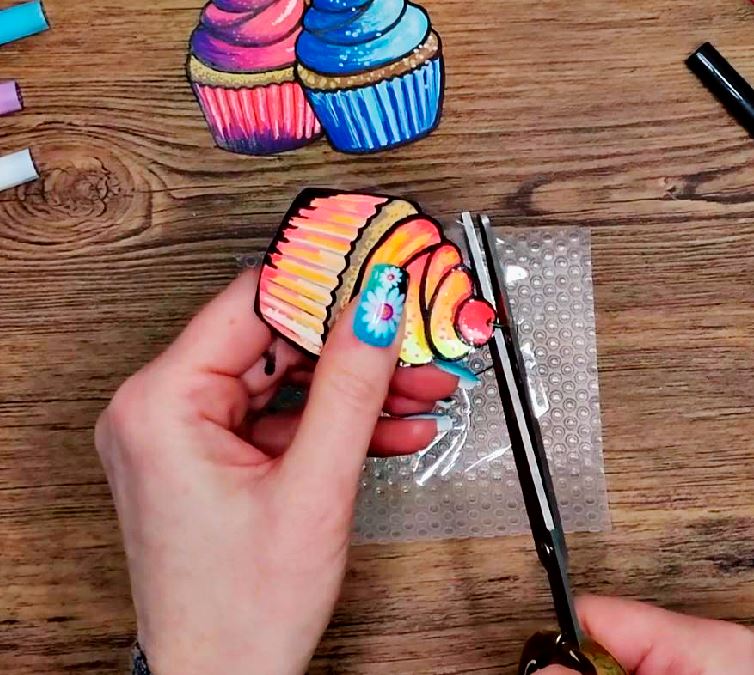
Step 10: Cut The Border
Now trim your stickers. Once each cupcake is cut, your stickers are ready for the next step which is to add double sided craft tape to the back. And they are done!
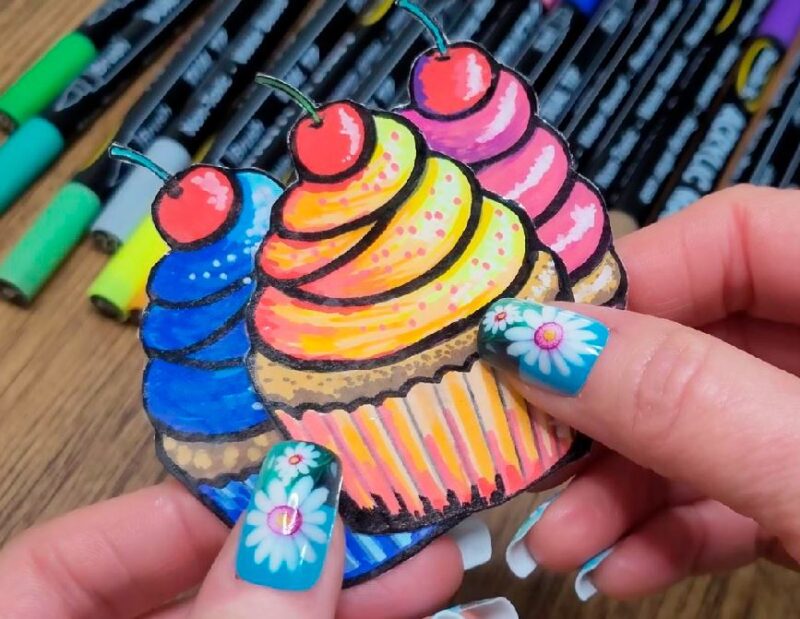
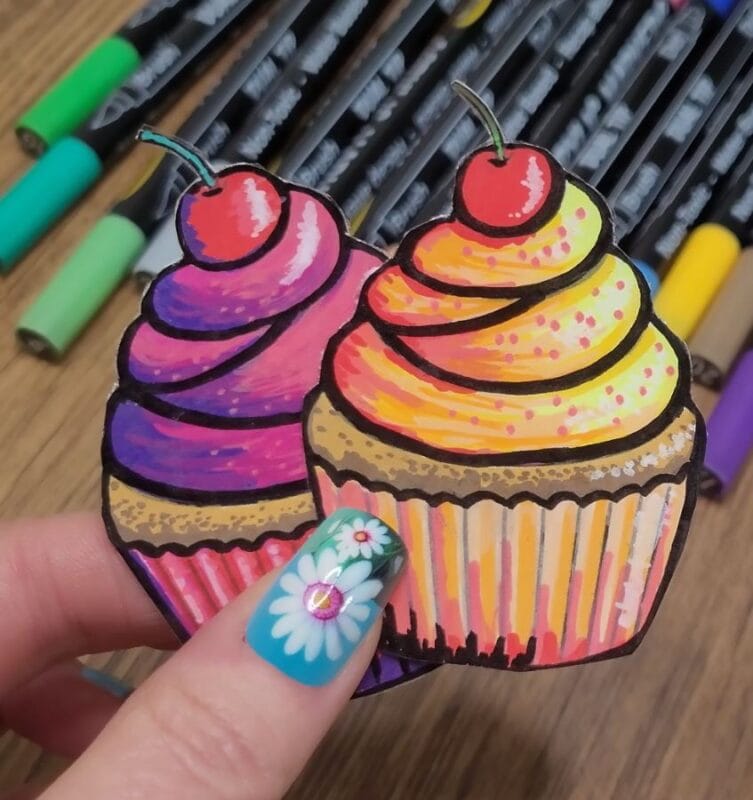
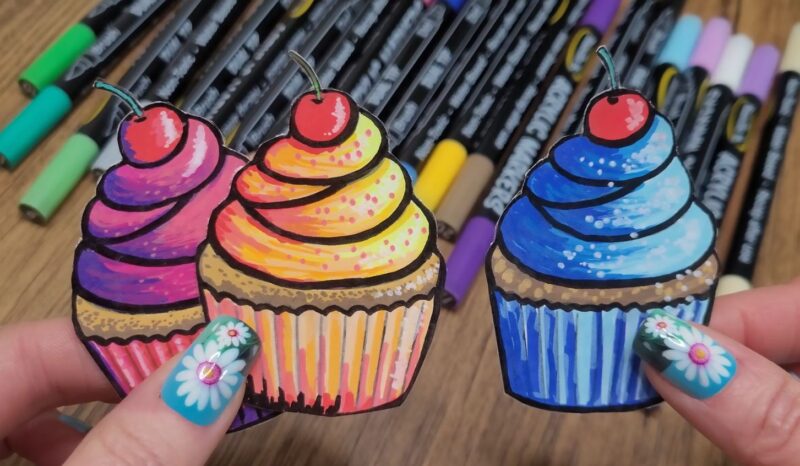
Here is how my cupcake stickers turned out! The soft pinks, creamy creams, and light browns blended together to give each cupcake a cheerful, handmade look. Adding white highlights made the frosting shine, and the clear tape gave them a smooth, glossy finish. I love seeing them all lined up and ready to use. They feel like little treats you can stick onto any page.
Video: Making Cupcake Stickers
Favorite Coloring Supplies
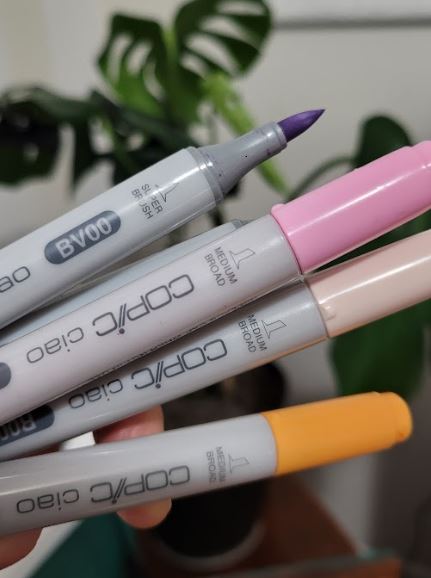
Copic Alcohol Markers
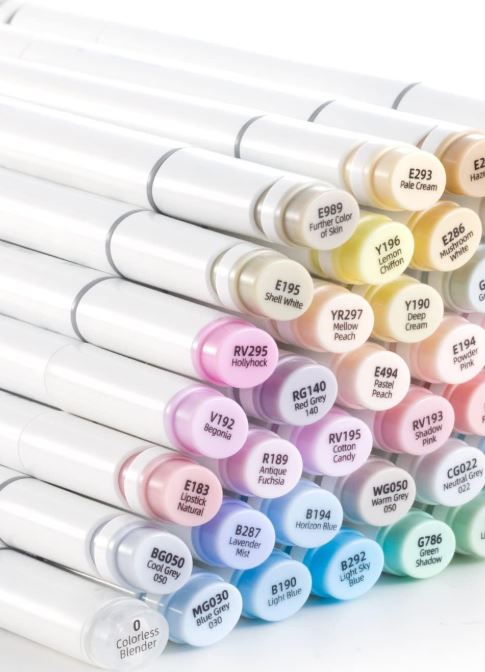
Ohuhu Alcohol Markers
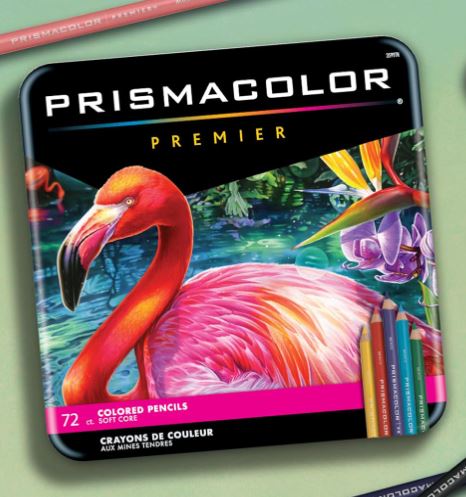
Prismacolor Premier
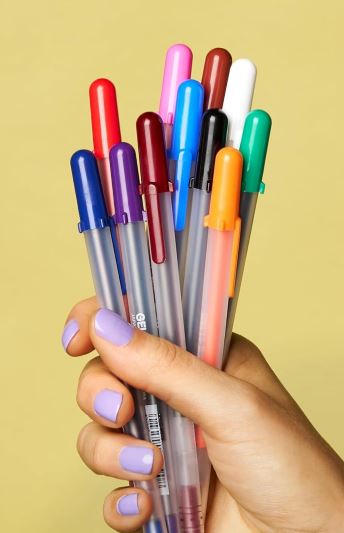
Gelly Roll Pens