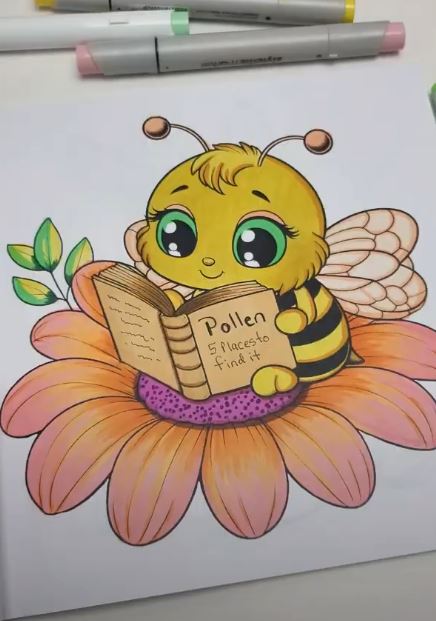
How To Color A Bumblebee Step by Step
Welcome to this fun and easy tutorial where I’ll be showing you how to color a bumblebee using alcohol markers! This bumblebee coloring guide will help you bring your bumblebee to life with rich colors and smooth blends. Isn’t it just adorable? Anyone can do this :). I’ll be walking you through step-by-step, so you can follow along and get your bumblebee perfectly colored. This is a great beginner lesson for when you are just getting learning how to use alcohol markers.
Alcohol markers are fantastic for creating vibrant images with their bold colors. And they just blend so smoothly, I really love using them. In this tutorial, I’ll show you how to use them to color in a cute little bumblebee. Grab your alcohol markers, and let’s get started!
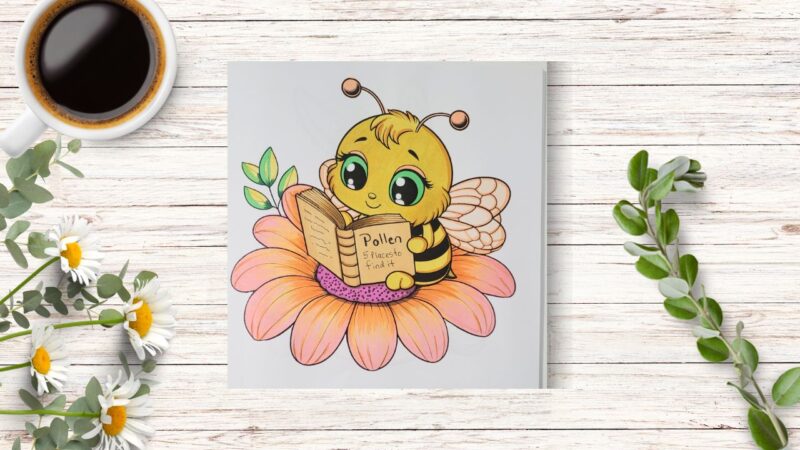
how to color a bumblebee
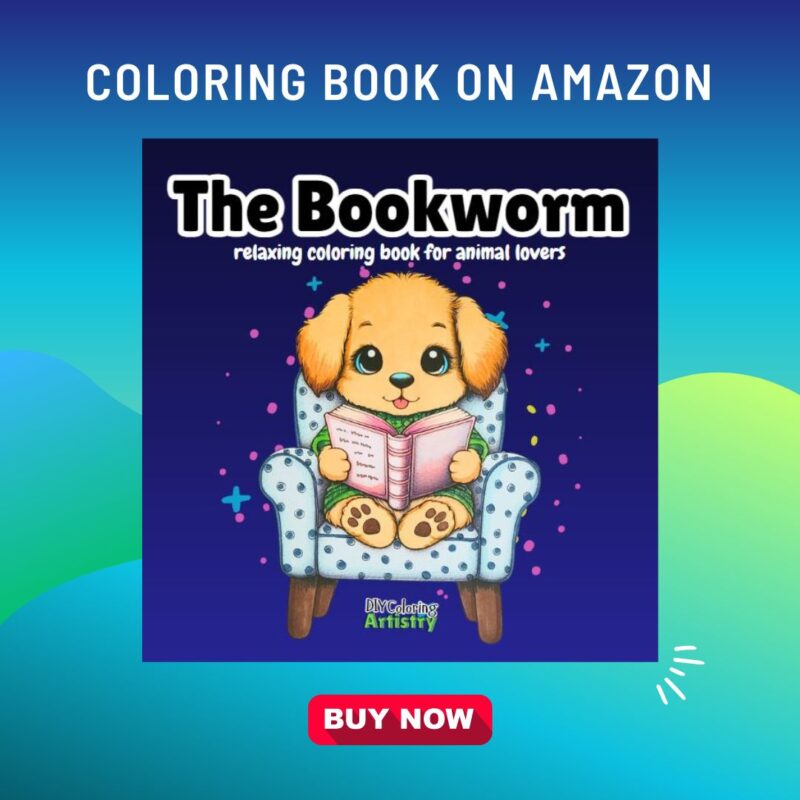
For this tutorial I’m using a coloring page from the Bookworm Coloring book on Amazon. If you do not have this book and want to color this exact page, then here is a free printable bumblebee coloring sheet.
Step 1: Choose Your Yellow Color for the Bee
Start by picking out a yellow alcohol marker to color in the main sections of the bumblebee’s body.
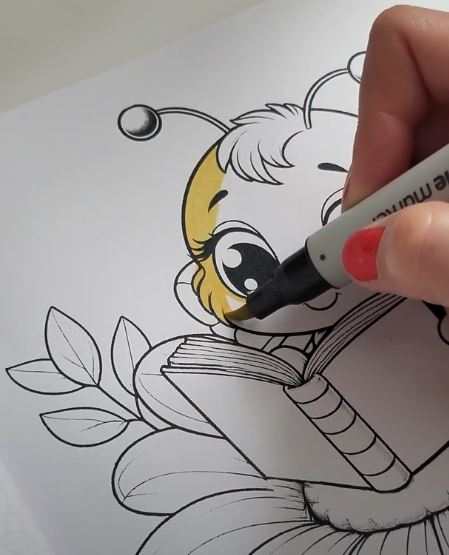
Focus on the areas that will be the bee’s yellow stripes, making sure to use smooth, even strokes. Take your time and allow the color to fully cover each section to create a vibrant base for the bee. You have to be careful with alcohol markers because they will spread past the lines. I like to color just before the lines and then the markers will soak in.
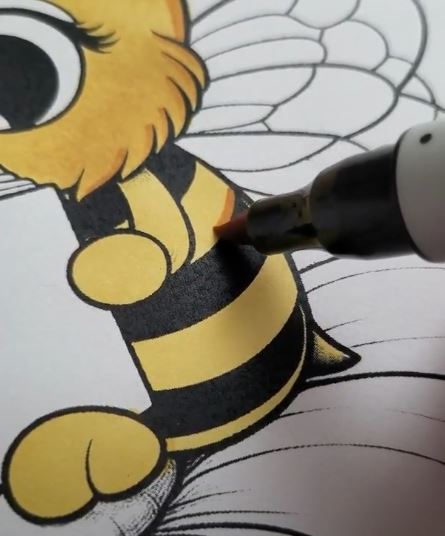
Step 2: Add Contrast with a Darker Yellow
Now, select a darker shade of yellow to add contrast and depth to the bee’s body. Gently apply this color along the edges of the yellow stripes or where shadows would naturally fall. When you add in these shading parts, it really starts to come together. This step will give your bumblebee more dimension and make the lighter areas stand out beautifully.
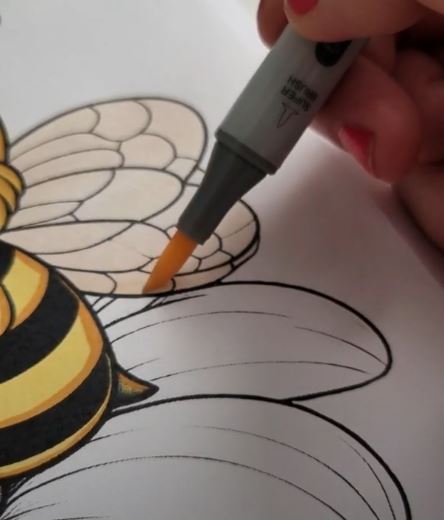
Step 3: Color the Wings with a Light Shade
Next, choose a light, airy color for the bumblebee’s wings, such as a pale pink. Use this light shade to fill in the wings completely. For this step, I like to use a very light color that you can barely see. But you can also go very bold and then add some white gel pen highlights too.
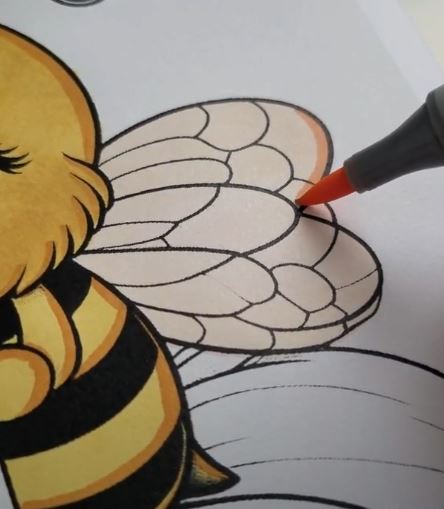
Let the layer dry and then take a darker shade that complements your base color, and carefully go over the wing’s darker lines or edges to add detail and definition.
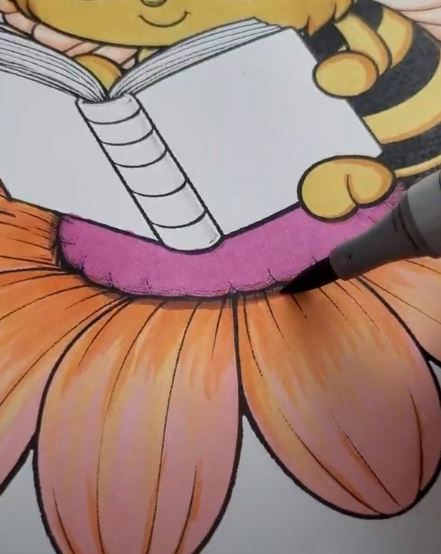
Step 4: Color the Center of the Flower
Pick out a color for the center of the flower, something that stands out, like pink or purple. Carefully color in the middle part of the flower, making sure it’s nice and even. This will set the foundation for the rest of the flower to pop with color.
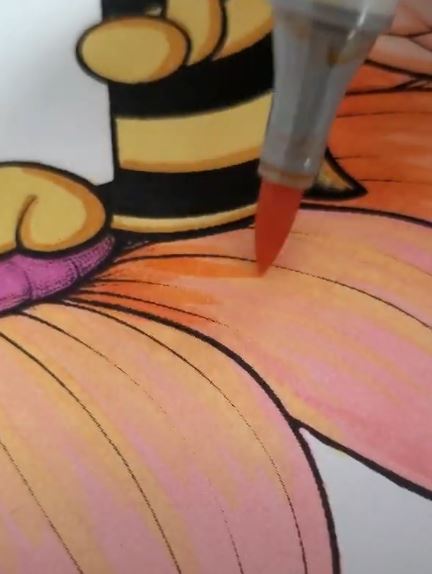
Step 5: Add Color to the Petals with Contrast
Now it’s time to pick your favorite color for the petals! Choose a color, such as pink or blue, and fill in the flower petals evenly.
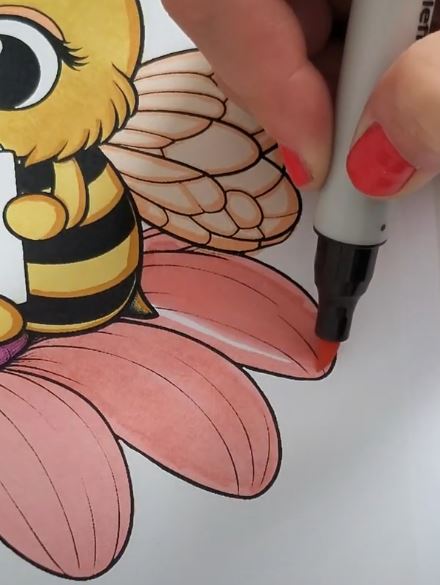
Afterward, select a complementary shade that is a little darker to add contrast. Use this darker shade to go over the edges of the petals or add lines in the center to create a more detailed, layered look.
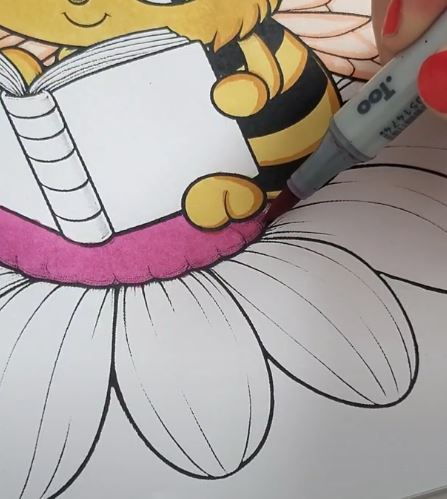
Step 6: Add a Shadow Under the Flower
To give your artwork a more grounded feel, choose a neutral or dark color, such as gray or light brown, and add a shadow beneath the flower. Purple is also a good color for shading too.
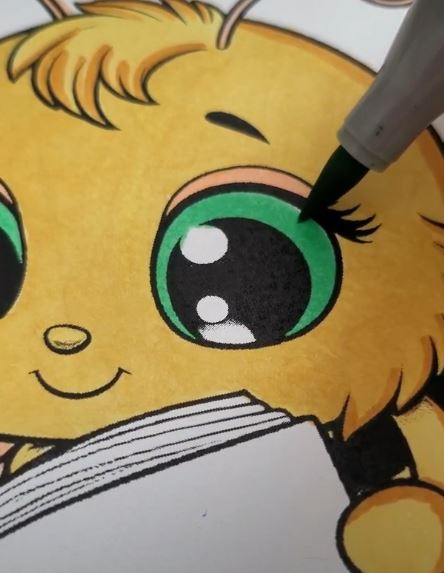
Step 7: Color in the Bee’s Eyes
Now focus on the bee’s eyes. Choose a fun and unexpected color and carefully fill them in. To make them stand out, you can leave a small white highlight on each eye to give the bee a lively, realistic appearance.
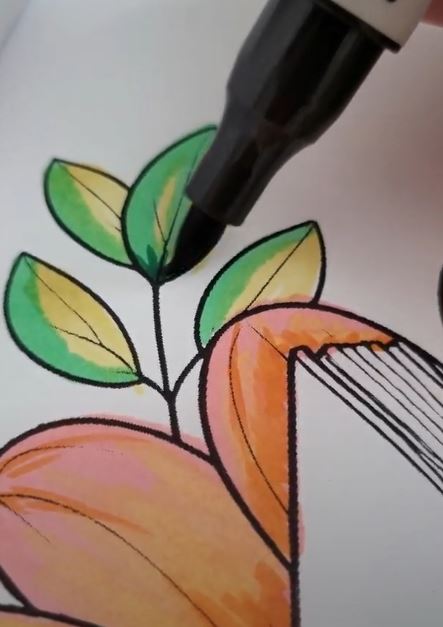
Step 8: Choose Three Colors for the Greenery
For the greenery around the flower, pick three different shades of green and yellows. Start by using the lightest yellow to fill in the leaves here and there. Then, layer on a medium green to add depth. Use the darkest green to enhance the shadows and the areas where the light wouldn’t reach, giving your greenery more color. When you start with the light color, you can start to add the darker colors to make it more realistic.
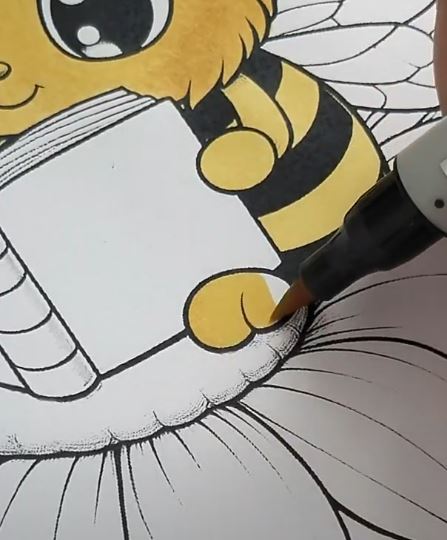
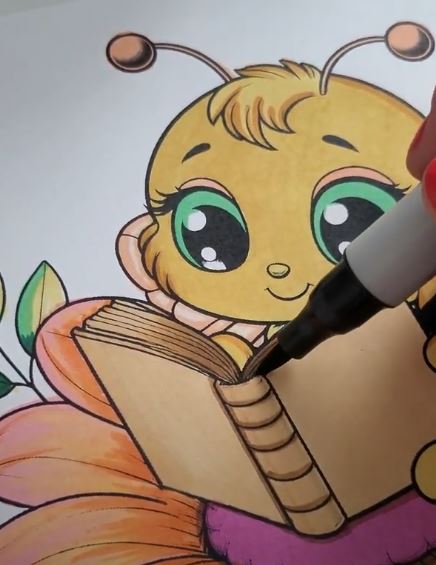
Step 9: Color the Book in Two Shades
Finally, choose two shades for the book. Use the lighter color to fill in the entire book. I’m using two brown shades. One is for the book and then the other is for the shading. Then, take the darker shade and add shadows to areas where the book would naturally have darker edges, such as near the spine or under any objects resting on the book.
And that’s it! You’ve now created a beautiful, vibrant bumblebee using alcohol markers. By layering colors, adding contrasts, and blending shades, you’ve brought your artwork to life with depth and detail.
Feel free to get creative with your colors and techniques in future projects. The more you experiment, the more you’ll discover how to make your artwork unique!
Thanks for following along, and remember, the more you practice with alcohol markers, the more confident and skilled you’ll become. Keep coloring and enjoy the process! If you want to color this bee right away, it’s part of this printable farm animals coloring pages. Download and print right from home
Did you color this bee? Share on the Facebook group DIY Coloring Artistry Facebook group
Favorite Coloring Supplies
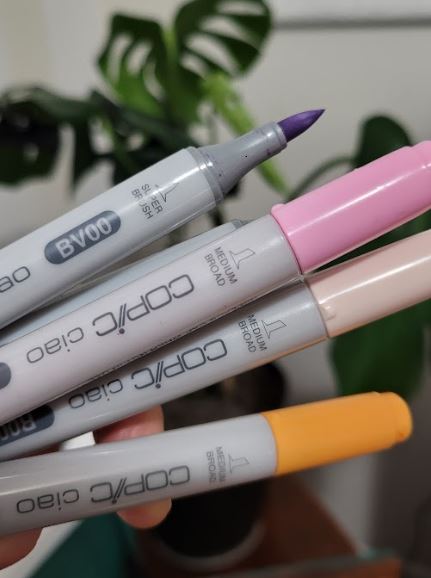
Copic Alcohol Markers
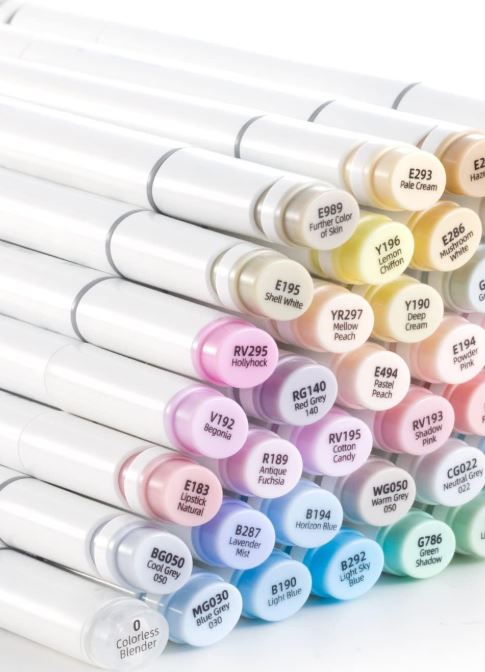
Ohuhu Alcohol Markers
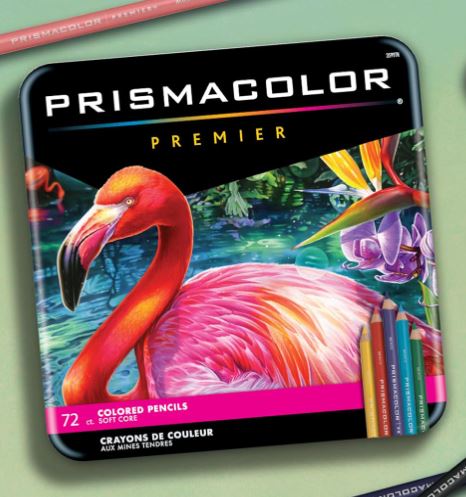
Prismacolor Premier
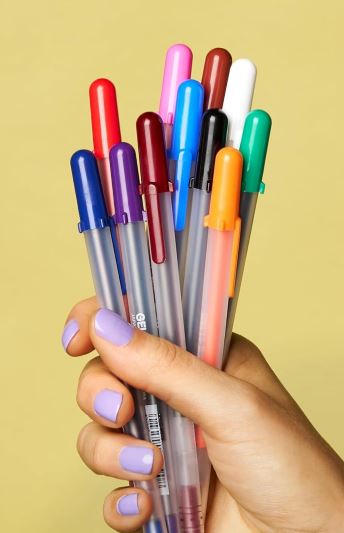
Gelly Roll Pens